Catalogue
Learn how to make the most delicious sourdough you will ever try

How to Make Sourdough Starter
I'm sure you've heard of sourdough starter and its benefits when making various types of bread and dough. If you haven't tried it yet because you think it's difficult or time-consuming, don't worry! If you want to start making your sourdough starter and enjoy it in your homemade bread and other recipes, keep reading. In this post, you will learn how to prepare it, how to feed it, and how to adapt it to your schedule. You'll find it's simpler than you think, so read this post carefully, and I'll tell you everything you need to know.
Why It's Good to Consume Sourdough Bread
Sourdough starter is rich in two types of digestion-friendly substances: dietary fiber and prebiotics. Both of these nourish the beneficial bacteria in your gut. Therefore, regular consumption of sourdough bread can improve gut health and aid digestion.
Bread fermented with sourdough starter is of higher quality compared to bread made with commercial yeast. Due to its lactic acid content, sourdough bread has a significantly better softness, volume, and texture.
What You Can Make with Sourdough Starter
Sourdough starter has a natural and artisanal production process that dates back many years. It is quite versatile and can be used to make anything from rustic bread to cakes or savory cookies with an exquisite taste and delightful crunchy texture.
Best Flour for Making Sourdough Starter
It's best to use whole wheat, wheat, or rye flour. "If refined flours are used, there will be fewer colonies of microorganisms because the parts with more yeast, which are found on the outer part of the grain, are removed."
- When feeding it, you notice that it rises very quickly.
- The texture of the sourdough starter is like mousse, full of air, and when you stir it, you'll hear a sound of air escaping.
- In a glass of water, place a small amount of sourdough starter. If it sinks, it needs to be fed again; if it floats, it's ready to use for making bread.
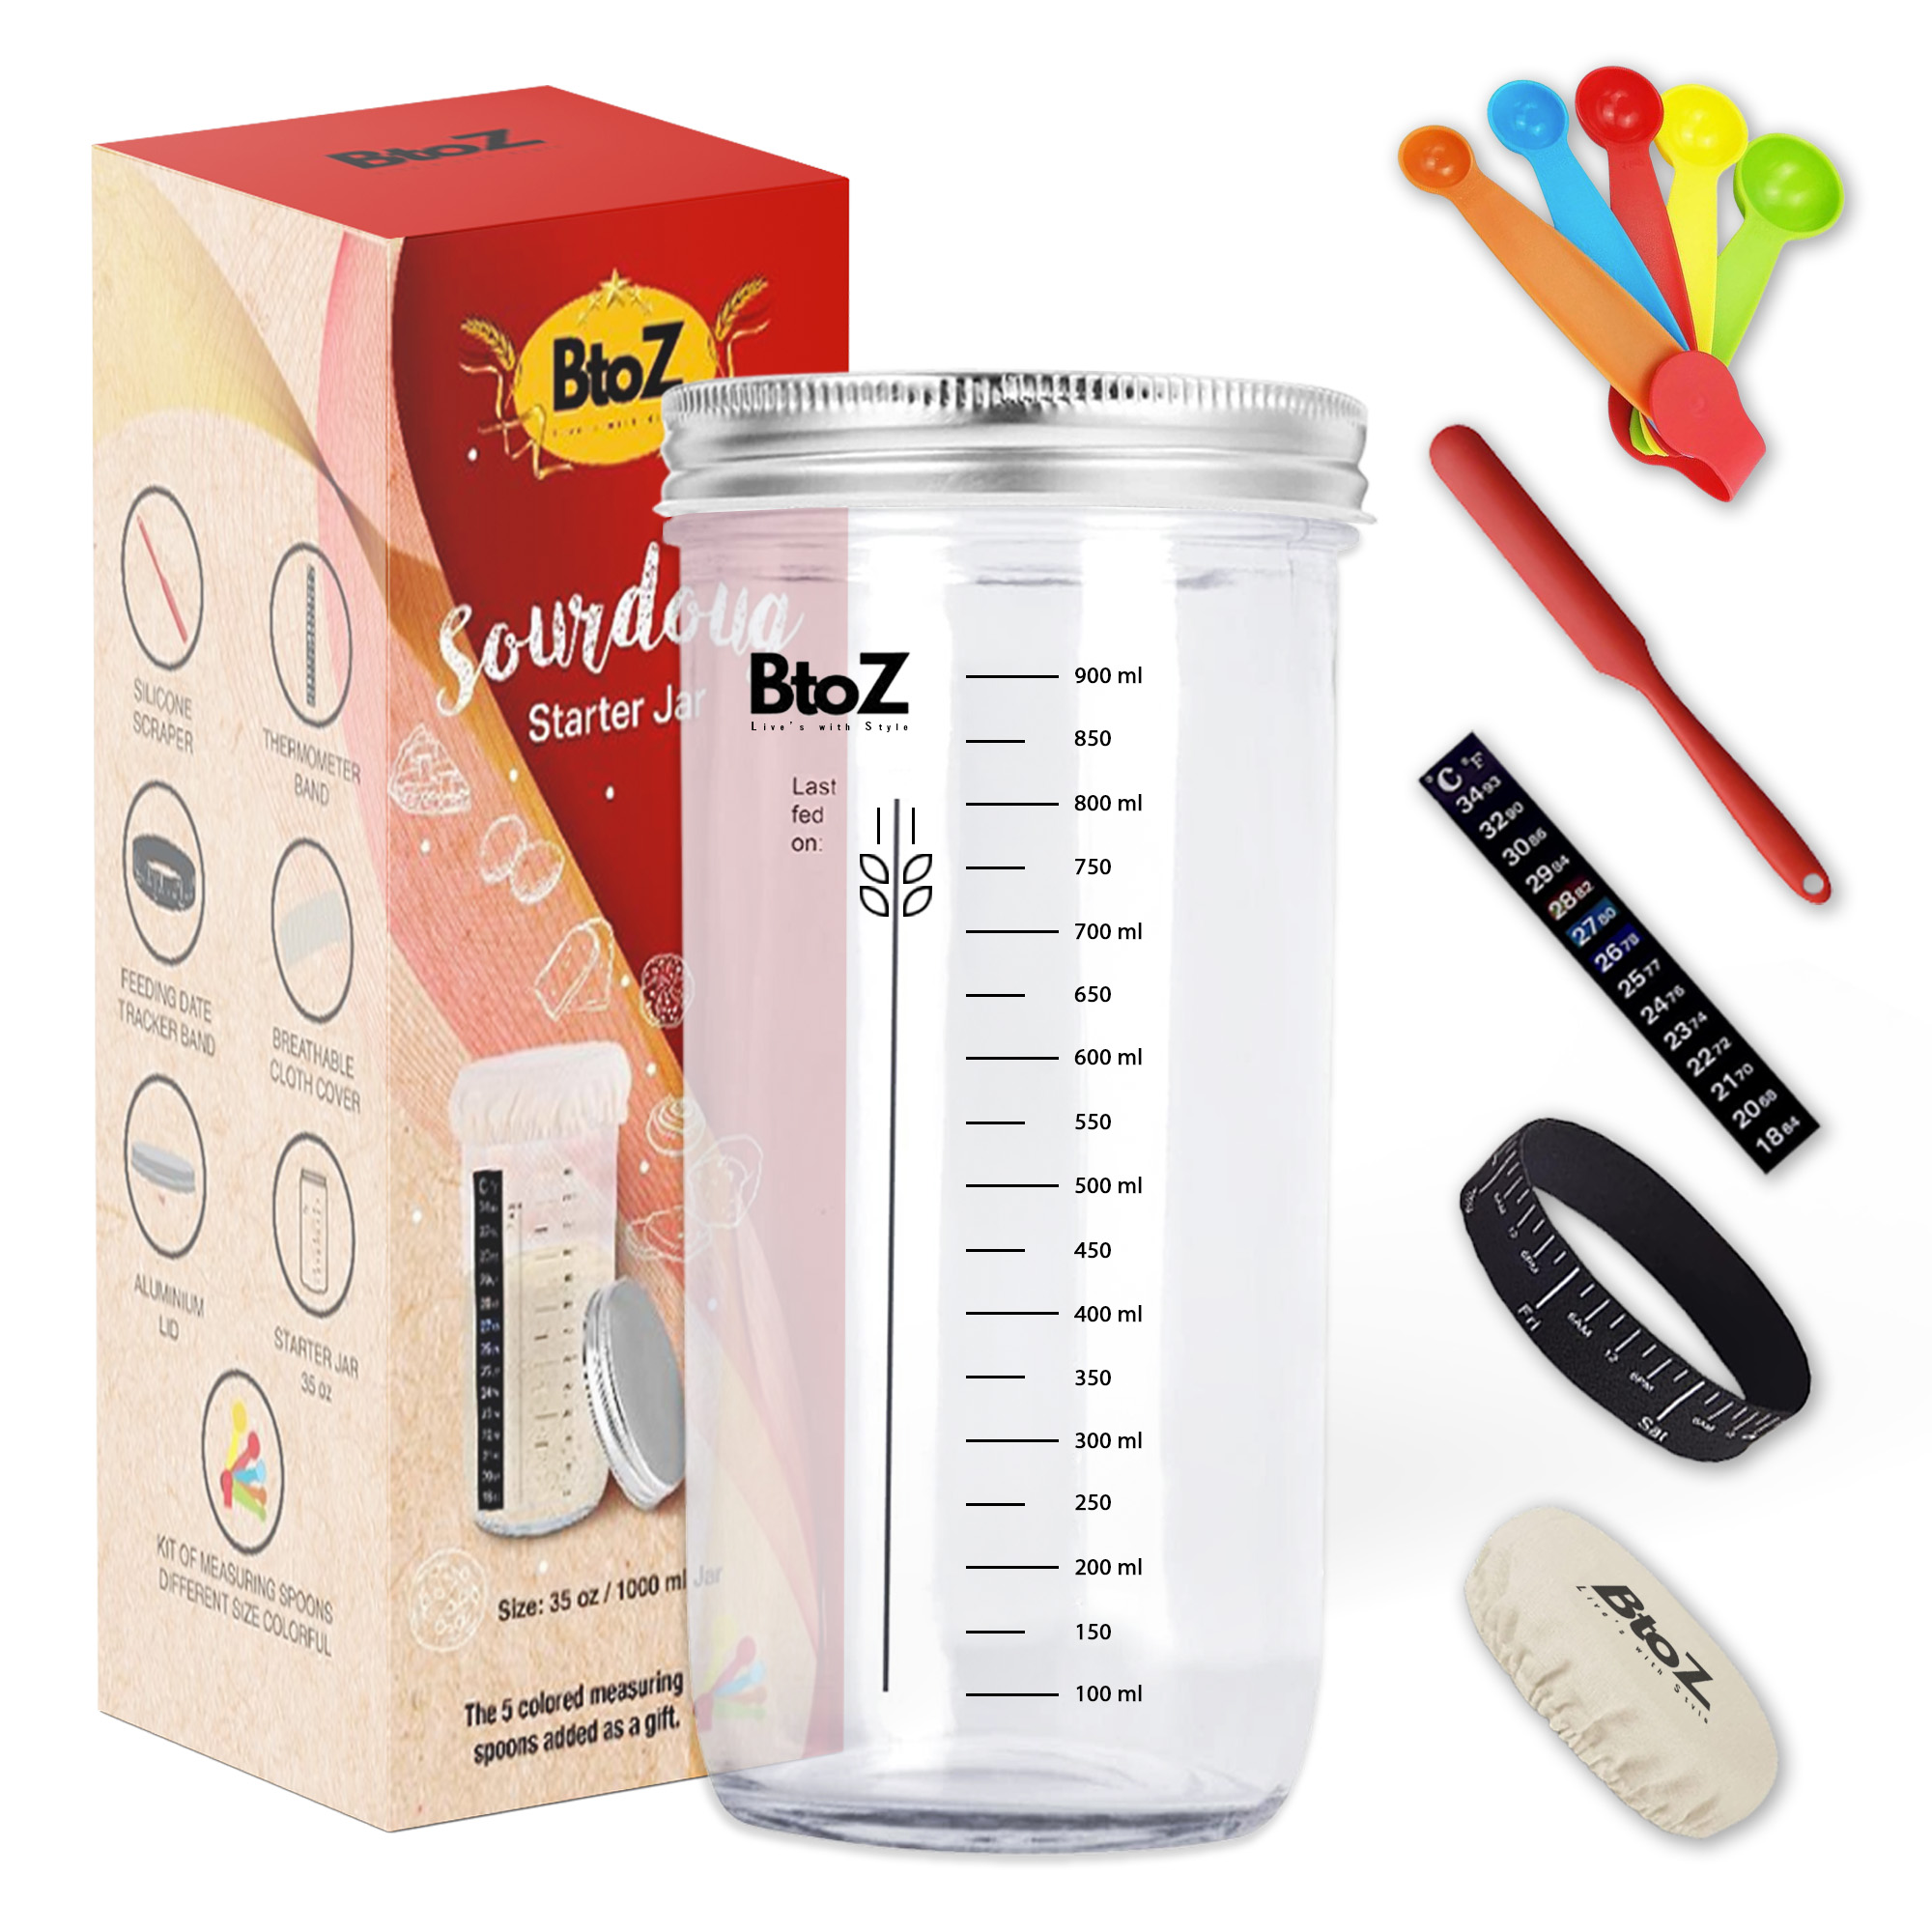
Day 1: In a clean glass jar, mix equal parts of flour and water (50g of each), stir until well combined, and cover the jar with a breathable cloth lid. Let it sit at room temperature for 24 hours.
Day 2: Add another 50g of flour and 50g of water, stir, cover, and let it sit at room temperature for another 24 hours.
Day 3: Again, add 50g of flour and 50g of water, following the same process as the previous two days, and let it sit for another 24 hours. You may start to see bubbles in the starter on this day. If not, don't worry, continue.
Day 4: Add another 50g of flour and 50g of water, stir, cover, and let it sit for 24 hours. Bubbles in the starter are likely by this point.
Day 5: Your sourdough starter is more developed. Yeast colonies have increased significantly, and from today on, you'll need to feed it more often (every 12-16 hours). You now have a total of 400g of sourdough starter (the sum of all the flour and water added so far). On the fifth day, keep 200g of your starter (from the bottom), discard the rest, and add 200g of flour and 200g of water. Stir, cover, and leave it at room temperature. At this point, it's important to observe. Use the "Feeding Date Tracker Band" to mark your starter's level and note the time. As time passes, your starter will increase in volume until it reaches its peak.
How to Know When Your Starter is at Its Peak: You'll know it has reached its peak when the starter leaves a mark in the jar and starts to sink. This is a clear sign that it needs to be fed again. Note the time when your starter is at its peak to determine how long it takes to become fully active, allowing you to adapt to your schedule.
Day 6: Repeat the same process as the previous day. At this stage, you have a young sourdough starter, and it's normal for it to take more time to reach its peak than a mature starter. If it's the sixth day, and your starter still takes several hours to become active, give it a few more days, continue feeding it, and you'll see that the time it takes to become active will reduce. Remember that it needs to be fully active before you can use it, which means it should double in size and have lots of bubbles.
Tips:
- You can use tap water, but filtered or bottled water is recommended.
- You can use any type of flour, but high-quality whole wheat or rye flour is preferred.
- If you maintain your sourdough starter at a mild temperature (between 24°C and 27°C), the bacteria will develop over time. Lower temperatures will slow the process, requiring more patience, while higher temperatures (up to around 32°C) will expedite it.
- Time and patience are crucial. Sometimes, several days may pass without seeing signs of life in your sourdough starter. Don't assume something went wrong and discard it prematurely. Give it more time, continue feeding it, and wait.
Note: This is a rough translation and may require minor adjustments for readability and context in English.
Contact
Need Help? Contact Us
Email Us
info@btoz.net